

Think solo Spirit Island is a luck slog you can’t reliably win?
It’s not.
The first two turns decide most solo games, and the right presence placement plus growth choices turn chaos into control.
This guide gives clear, proven solo scenario tactics: how to stop early builds, pick spirits that scale alone, and manage energy and fear so you reach midgame with tempo.
If you want repeatable wins, read on for concise, turn-by-turn priorities and spirit picks that actually win.
Core Principles for Winning Solo Games
Solo Spirit Island means you’re managing board control, invader escalation, and fear generation without anyone covering your weak spots. Your first two turns decide whether you hit midgame in control or spend the rest of the game scrambling. Those opening rounds have one job: contain the first two build cycles and stabilize the explorer spread. Let explorers consolidate into towns before you’ve positioned presence and unlocked removal powers, and you’ll fight catch-up until you lose. Start by placing presence near likely build sites and grab growth options that give you immediate card plays or permanent energy increases.
Board control tempo matters more when you’re solo because nobody else is handling the corner of the island you’re ignoring. You need to track your card economy each turn. How many plays will you have next turn? How much energy will those plays cost? Should you hold back 1 or 2 energy for an emergency fast response? Reliable damage patterns are the backbone of solo success. If your spirit doesn’t have consistent single-target removal or area control, invaders will multiply faster than you can answer them. Presence placement tempo is just as critical. You should be adding one presence per turn for the first three turns as a baseline. Fall behind that pace and you’re limiting your range, innate power thresholds, and energy generation for the rest of the game.
Essential principles for solo victories:
- Rapid board stabilization. Contain invader expansion within the first 3 turns by targeting explorer clusters and stopping early town formations in critical lands.
- Predictable damage deployment. Make sure you can remove at least one town or city every 2 to 3 turns. Unreliable removal forces you into defensive postures that can’t win.
- Fast fear cycling. Generate steady small amounts of fear (2 to 4 per turn early) to accelerate tier progression and unlock fear cards that slow down invaders.
- Managing blight threshold risk. Know your spirit’s blight tolerance. Accept calculated blight in low-value lands to save energy and card plays for high-impact moves.
- Efficient energy planning. Keep a 1 or 2 energy reserve for reactive fast plays. Running your energy pool to zero every turn leaves you unable to respond to unexpected invader placements.
- Consistent targeting of invader escalations. Prioritize removing cities and towns in chokepoints over clearing explorers in low-threat areas. One city left unchecked cascades into multiple ravages that cost you the game.
Choosing the Best Spirits for Solo Play

Evaluating a spirit’s solo potential starts with four questions. Can it reach multiple lands early? Does it have fast disruption or reliable damage? Can it scale its offense without relying on other spirits? Does it defend itself while pressuring invaders? Spirits that answer yes to three or four of those questions dominate solo play. Range and speed are non-negotiable. If your spirit can’t touch invaders before they build, you’ll lose territory faster than you can reclaim it. Scalable offense means your damage output or control effects improve predictably as you add presence and unlock innate thresholds. Early defense isn’t about preventing all blight. It’s about absorbing one or two ravages without collapsing while you set up your removal engine.
High-control spirits and flexible generalists excel in solo games because they handle multiple threat types without waiting for lucky power card draws. A spirit that can push, damage, and defend across a wide area will outperform a hyper-specialized spirit that needs specific setups or external synergies. Avoid spirits with slow scaling curves or narrow win conditions unless you’re experienced enough to pilot them through the vulnerable early turns. Spirits that rely heavily on adjacent allied presence or team-based card synergies struggle in solo. Their signature strengths disappear when they operate alone.
Strong solo spirits and their standout traits:
- Vital Strength of the Earth. Top-tier solo pick for reliable defense and scalable removal. Innate powers provide consistent land control, and the spirit can hold defensive lines while building toward major offensive plays.
- Lightning’s Swift Strike. Excels at fast single-target kills and clearing explorers before they build. High mobility and repeatable damage let you shut down multiple expansion fronts each turn.
- River Surges in Sunlight. Versatile control and healing with strong push effects. Performs exceptionally well on coastal or wetland-heavy boards where its range advantages shine.
- Ocean’s Hungry Grasp. Dominates coastal maps with devastating single-land control and invader drowning. Limited inland reach makes it map-dependent, but on favorable boards it’s nearly unstoppable.
- Shadows Flicker Like Flame. Stealth and area control with high utility for hit-and-run tactics and fear spikes. Requires careful planning but rewards precise play with overwhelming board dominance.
Early-Game Decision Priorities

Your first growth choice sets the tempo for the entire game. If your spirit offers a growth option that places presence and grants a card play or energy, take it unless you have a compelling reason not to. That presence expansion unlocks range, energy tracks, and innate thresholds faster than any other choice. On Turn 1, place your new presence on a land adjacent to the most dangerous upcoming build or in a central location that maximizes your ability to reach multiple threatened lands in Turn 2. Your opening card plays should focus on disruption or small removal, not expensive setup powers. A fast push that moves an explorer off a high-value land is often more impactful than a slow major power you can’t afford to play again for three turns.
By Turn 2, you should have a clear picture of where the invader deck will build and ravage over the next two turns. Use that knowledge to position your second presence placement and prioritize powers that stop those builds or remove the explorers feeding them. If you see a coastal land about to spawn a town that will ravage a sacred site, killing that explorer now prevents a cascade of problems later. Don’t chase perfect synergy in your first power card gains. Grab reliable damage or control even if it doesn’t fit your long-term elemental strategy. You can refine your deck after you’ve survived the early pressure.
Optimal early-game sequencing:
- Turn 1 Growth. Choose presence placement plus card play or energy. Place presence centrally or near the highest-threat build location.
- Turn 1 Fast Power. Use disruption (push, gather, or small damage) to prevent an explorer from becoming a town in a critical land.
- Turn 2 Growth. Prioritize another presence placement if available, or take energy/card draw to enable more plays next turn.
- Turn 2 Slow Power. Deploy your first removal effect to clear explorers before they consolidate into towns. Target lands that will build next turn.
- Turn 3 Stabilization. By now you should have 3 to 4 presence on the board and consistent access to 2 or 3 card plays per turn. Focus on removing at least one town or preventing multiple builds to stop runaway expansion.
Mid-Game Board Management and Scaling

Once you’ve stabilized the explorer spread and stopped the first wave of uncontrolled town growth, the mid-game becomes a race to upgrade your card play tracks and presence while keeping invaders from regaining momentum. This is when you transition from reactive survival to proactive control. Your presence placement decisions shift from “where do I need to be now” to “where will I need range in two turns.” Look at the invader deck and anticipate which lands will see heavy activity, then position presence to cover those areas before threats materialize. Adding one presence per turn should remain your baseline unless you’re deliberately sacrificing tempo to unlock a major power or energy threshold that will immediately pay for itself.
Spread patterns change as the game progresses, and you need to adapt your response strategy. Early game, invaders cluster near coasts and low-defense lands. By mid-game, they’re building deeper inland and creating multi-land ravage chains. You can’t afford to react to every single build anymore. Instead, identify chokepoint lands where removing one town prevents two future ravages, or lands where a single push redirects invader flow away from sacred sites. Keep consistent pressure on the invader engine by removing at least one town or city every two turns. Let them accumulate and you’ll face overlapping ravages that no amount of late-game power can recover from.
Scaling your offense without losing tempo requires balancing immediate needs against long-term growth. If your spirit has a strong mid-game innate that unlocks at 4 or 6 presence, it’s often worth delaying a major power gain to hit that threshold one turn earlier. Conversely, if you’re struggling to keep up with invader spread, grabbing a versatile minor power with fast speed can buy you the breathing room to scale safely next turn. Watch your energy curve closely. Mid-game is when many spirits unlock +2 or +3 energy per turn from their tracks, and that’s your signal to start playing more expensive powers and holding fewer reserves. Just don’t drain your pool completely. Keep 1 energy back for an emergency fast response until you’re confident the board is locked down.
Late-Game Win Conditions and Execution

Fear victory is often the fastest and most reliable solo win condition because you control the fear pool entirely and can time your pushes to maximize fear card draws. Once you’ve stabilized the board and built up a presence network that covers most active lands, shift your focus from defensive control to concentrated fear generation. Look for powers and combos that can spike 6 to 10 fear in a single turn, then time those spikes to occur just after you cross a fear card threshold. Each fear card you draw reduces invader tempo or outright removes invaders, accelerating your path to the next tier. If you’re aiming for a terror level 3 victory, calculate how many more fear points you need and how many turns it will take to generate them, then work backward to ensure you have the energy and card plays to execute that plan without letting invaders rebuild pressure in the meantime.
High-damage spirits can close out invader destruction victories if fear generation isn’t viable, but this path requires careful timing of major power use. Major powers are expensive and often slow, which means you need to plan one or two turns ahead to ensure you have the energy and board state to deploy them effectively. The ideal late-game turn combines a major slow power that removes multiple towns or a city with smaller fast powers that prevent new builds or explorers from refilling the cleared lands. Don’t hold back waiting for the perfect moment. If a major power will remove enough invaders to prevent two ravages and generate significant fear, play it even if the setup isn’t flawless. Late-game losses often come from players hoarding resources for an ideal turn that never arrives while invaders quietly rebuild to critical mass.
Power Card Priorities and Upgrades

Fast control powers and reliable single-target damage are your highest-value pickups in solo play because they let you respond to immediate threats without waiting for the slow power phase. A fast power that removes 2 damage or pushes invaders off a sacred site can prevent blight, while a slow power with the same effect often arrives too late to matter. When choosing new powers, prioritize cards that either expand your range, increase your damage output, or provide repeatable effects you can use every turn. Cards that depend on specific elemental thresholds or require setup from other powers are risky in solo because you can’t rely on an allied spirit to provide the missing elements or board state.
Expensive major powers must justify their cost with immediate, game-changing impact. In multiplayer, a major power that sets up a combo for another spirit is fine. In solo, every major power needs to remove multiple invaders, generate significant fear, or permanently alter the board state in your favor. If a major costs 5+ energy and doesn’t accomplish at least two of those goals, skip it and take a cheaper minor power that you can play consistently. Elemental synergies matter more in solo than multiplayer because you’re the only source of elements for your innate powers. When evaluating a new power card, check whether it provides elements that unlock your key innates or whether it’s a dead draw that dilutes your deck.
| Power Type | Why It Matters for Solo |
|---|---|
| Fast Single-Target Damage | Lets you kill explorers and towns before they act, prevents builds and reduces ravage damage in the invader phase. |
| Area Control / Push Effects | Repositions multiple invaders at once, creates safe zones and forces invaders into low-value lands where ravages are less costly. |
| Repeatable / Low-Cost Powers | Provides consistent turn-to-turn utility without draining your energy pool, essential for maintaining tempo while scaling. |
| High-Fear Generation | Accelerates terror level progression and draws fear cards that reduce invader pressure, often the fastest path to solo victory. |
Invader Management Methods

Controlling invader escalation in solo play demands that you stay one step ahead of the invader deck at all times. The deck shows you exactly where explorers will appear, where builds will occur, and where ravages will hit, so use that information to position presence and plan card plays before threats materialize. Preventing a build is almost always more efficient than cleaning up a town later, and preventing a ravage is worth sacrificing other opportunities. When you see a land about to build in two turns, place presence near it now and hold back a damage power so you can kill the explorer before it becomes a town. This proactive approach keeps invader density low and reduces the number of lands you need to defend simultaneously.
Blight risk management in solo is about accepting calculated losses and prioritizing high-value lands. You can’t prevent every ravage, especially once the invader deck reaches Stage II and starts overlapping threats across multiple lands. The key is identifying which ravages you can afford to absorb and which will cascade into game-ending problems. A ravage in a single-explorer land that adds one blight is often preferable to spending your entire turn’s energy preventing it, especially if that energy could remove a town in a more dangerous location. Watch your blight card’s flip condition closely. If you’re one or two blight away from flipping the card and triggering a loss condition, tighten up your defense even if it costs tempo. If you have blight to spare, accept it strategically to preserve resources for larger threats.
Cities are the single most dangerous invader type in solo because they double ravage damage and make future builds more threatening. When a city appears on the board, make removing it your top priority unless doing so would let three towns build unopposed. Cities also complicate blight management because a single ravage from a city can add multiple blight and trigger cascades. If you can’t remove a city immediately, focus on emptying the land of towns and explorers so the city ravages alone with reduced impact. Use pushes and gathers to isolate cities in lands where ravage damage is low or where you’ve already accepted blight, then remove them when you have the energy and card plays to do so efficiently.
Fear Generation Techniques

Fear farming is a reliable solo win path because you cycle through the fear deck faster than multiplayer groups and can time fear spikes to maximize card draw value. Early in the game, generate small steady amounts of fear, 2 to 4 per turn, to build toward your first fear card without overinvesting energy that you need for board control. Each fear card drawn in the early and mid-game reduces invader tempo by removing explorers, downgrading towns, or preventing builds, which buys you the time to scale your presence and power deck. Once you’ve stabilized the board and reached the mid-game, start looking for opportunities to spike 6 to 10 fear in a single turn by combining multiple fear-generating powers or using a major power with high fear output.
Timing your fear generation to cross terror level thresholds efficiently is the difference between a smooth solo win and a drawn-out struggle. If you’re at terror level 1 and need 12 more fear to reach level 2, plan your next two turns to generate exactly that amount rather than overshooting by 5 fear or undershooting and needing a third turn. Fear cards become more powerful as terror levels increase, so reaching level 2 and especially level 3 accelerates your win condition dramatically. At terror level 3, fear cards often remove multiple invaders or prevent entire build phases, which can lock down the board long enough for you to generate the remaining fear needed for a fear victory. Don’t get greedy and chase a terror level 4 victory if level 3 cards are already giving you the control you need to finish the game in two or three more turns.
Scenario-Specific Solo Tips

Scenarios alter the baseline rules and escalation curves of Spirit Island, and solo players need to adapt their strategies to account for those changes without the flexibility of a team to cover weak points. High-pressure scenarios like “Blitz” or adversaries that accelerate build or ravage timing demand that you prioritize early removal and presence placement even more aggressively than in standard games. If a scenario adds extra explorers or towns at setup, your Turn 1 and Turn 2 plays must focus entirely on containing that initial surge rather than scaling your long-term engine. Accept that you’ll be in reactive mode longer than usual and plan to hit your stabilization point one or two turns later than you would in a base game.
Scenarios with altered fear mechanics or invader deck modifications require you to recalculate your win condition timing. If a scenario reduces the number of fear cards per level or increases the fear required to draw cards, fear victories become slower and less reliable. In those cases, shift toward invader destruction or board control strategies and treat fear generation as a tempo tool rather than your primary win path. Conversely, scenarios that increase fear card power or reduce fear requirements make fear farming the dominant strategy, so prioritize spirits and power cards with high fear output from the start.
Low-growth or resource-constrained scenarios force you to make tough trade-offs between presence placement, energy economy, and card plays. If a scenario limits your growth options or reduces starting energy, focus on powers with low costs and repeatable effects rather than expensive majors that you can’t afford to play consistently. Look for growth tracks that grant permanent energy increases early so you can recover from the constrained start by the mid-game. Map layouts with limited coasts, isolated inland regions, or uneven blight distribution also shift your spirit selection and opening priorities. Coastal-dependent spirits like Ocean’s Hungry Grasp become weaker on inland-heavy maps, while spirits with strong inland reach and flexible damage patterns become stronger.
Scenario adjustments for common solo challenges:
- High initial invader count. Prioritize AOE removal and fast damage powers in your first two card gains. Delay major power selection until you’ve cleared the initial wave.
- Accelerated build or ravage phases. Place presence defensively near sacred sites and high-value lands. Hold energy reserves for emergency fast responses every turn.
- Reduced fear effectiveness. Shift win condition toward invader destruction. Take powers that provide reliable single-target and area damage over fear-focused cards.
- Map layouts with isolated regions. Choose spirits with long range or mobility powers. Plan presence placement to create overlapping coverage rather than concentrating in one area.
Common Solo Mistakes and How to Avoid Them
Over-expanding presence too quickly is one of the most frequent solo errors because it feels productive but leaves you with insufficient energy to play the powers that make that presence useful. Adding presence every turn is correct, but only if you’re also unlocking energy thresholds or maintaining enough income to play 2 to 3 powers per turn. If you’re placing presence aggressively but running out of energy by Turn 3, slow down and take growth options that increase your energy track or grant card plays instead. Your presence network is only valuable if you can afford to use the powers that activate it.
Chasing expensive major powers too early is another common trap. Major powers are appealing because they offer dramatic effects, but in solo play they often arrive too late to matter or cost so much energy that you can’t afford your other essential powers. Unless a major power immediately solves a critical board-state problem or generates enough fear to push you to the next terror level, skip it and take a cheaper minor power that you can play every turn. Consistency beats explosiveness in solo because you can’t rely on another spirit to cover for you while you recover from an expensive play that didn’t pay off.
Poor blight risk evaluation leads to players either over-defending low-value lands or under-defending critical ones. Not every ravage is worth preventing. If a land will ravage for 1 damage and you’d need to spend 3 energy and a card play to stop it, accept the blight and use those resources to remove a town in a more dangerous location. Conversely, failing to recognize when a ravage will flip your blight card or cascade into multiple additional blight leads to sudden losses that feel unexpected but were entirely predictable. Before each invader phase, mentally calculate which ravages will occur, how much damage they’ll deal, and whether you can afford to let any of them resolve.
Five common solo mistakes and corrections:
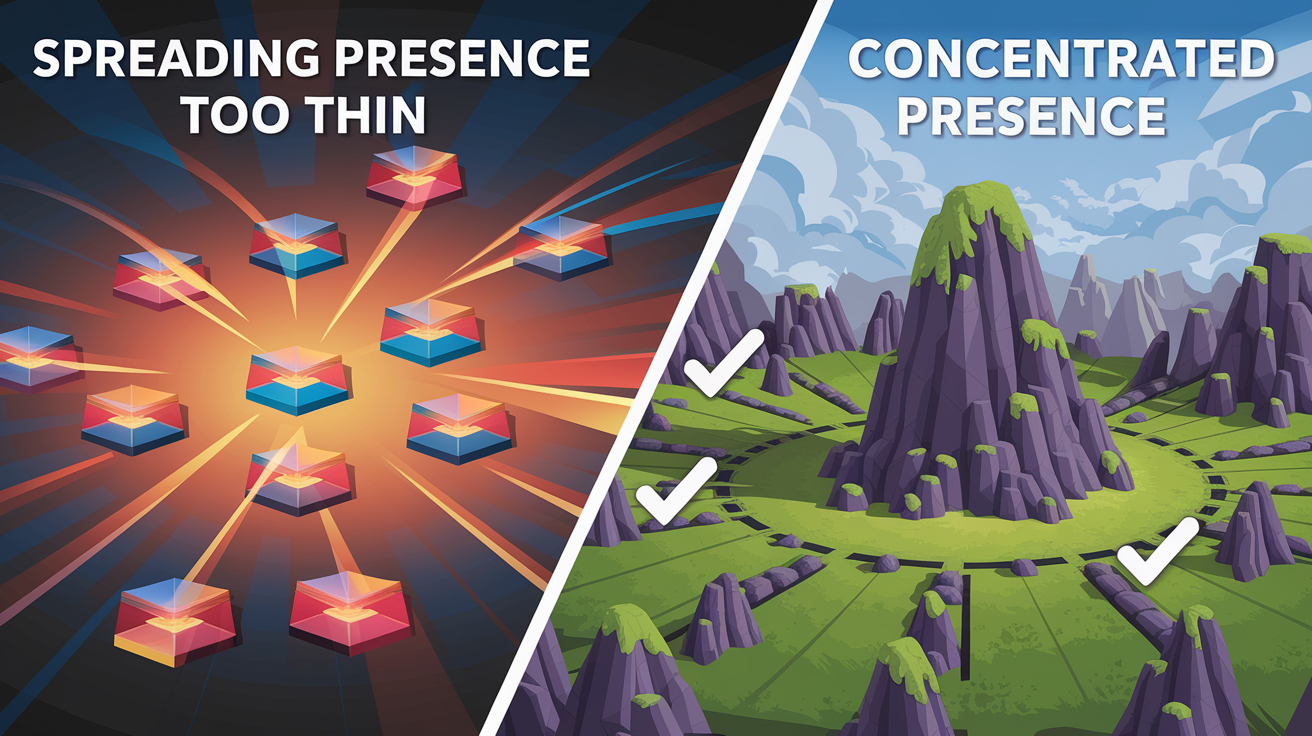
- Spreading presence too thin across many lands. Concentrate presence to access stronger range and innate thresholds. Three presence in adjacent lands is more powerful than three presence scattered across the board.
- Ignoring energy economy. Maintain 1 to 2 energy reserves every turn for fast responses. Running your energy to zero leaves you unable to react to unexpected invader placements or escalations.
- Failing to prioritize city removal. Cities multiply ravage damage and accelerate loss conditions. Always make removing cities your top priority unless doing so would cause multiple other critical failures.
- Chasing perfect card synergies. Play impactful powers even if they don’t align perfectly with your elemental strategy. Waiting for ideal conditions costs you tempo and lets invaders spiral out of control.
- Undervaluing fast powers. Fast powers prevent builds, reduce ravage damage, and let you respond to threats in real time. Don’t treat them as weaker than slow powers just because they’re cheaper or less flashy.
Final Words
Focus on tempo and board control from turn one. Prioritize containing early builds, stabilizing explorers, and setting reliable damage and fear patterns.
Choose spirits with fast control and good range. Plan your first two turns, then shift into mid-game scaling and steady pressure. Keep energy and blight risk in mind and only buy majors that pay off.
Use this spirit island board game solo scenario strategy guide as a short checklist of core principles, spirit picks, early sequencing, mid-game timing, and late-game finishers. Play one more solo run and you’ll see the difference.
FAQ
Q: What is the easiest solo spirit in Spirit Island?
A: The easiest solo spirit in Spirit Island is often Vital Strength of the Earth. It offers straightforward defensive powers, simple presence placement, and reliable crowd control, good for learning tempo and board stabilization.
Q: How long does Solo Spirit Island take?
A: Solo Spirit Island games typically take about 60 to 120 minutes, depending on spirit complexity, scenario, and player familiarity. Plan extra time for setup and learning new spirits.
Q: What are scenarios in Spirit Island?
A: Scenarios in Spirit Island are alternate setups and rule variants that change objectives, invader behavior, or map layout, forcing different strategies and offering varied difficulty and replayability.
Q: Does removing a town generate fear in Spirit Island?
A: Removing a town does not automatically generate fear in Spirit Island. Fear only comes from powers or effects that explicitly state they generate fear, or from specific rules that move the fear track.
