

Think a sturdy wall keeps you safe in The Isle? It doesn’t. Location, resources, and layered defenses do. In this walkthrough you’ll learn what to grab in your first 10 minutes, how growth stages change your goals, where to plant a base for steady water and cover, and which build order stops most raids. Follow these priorities and you’ll go from juvenile prey to a territorial pack fast. Read on for exact resource counts, base placement rules, and simple defensive steps that actually work.
Early Survival Foundations in The Isle

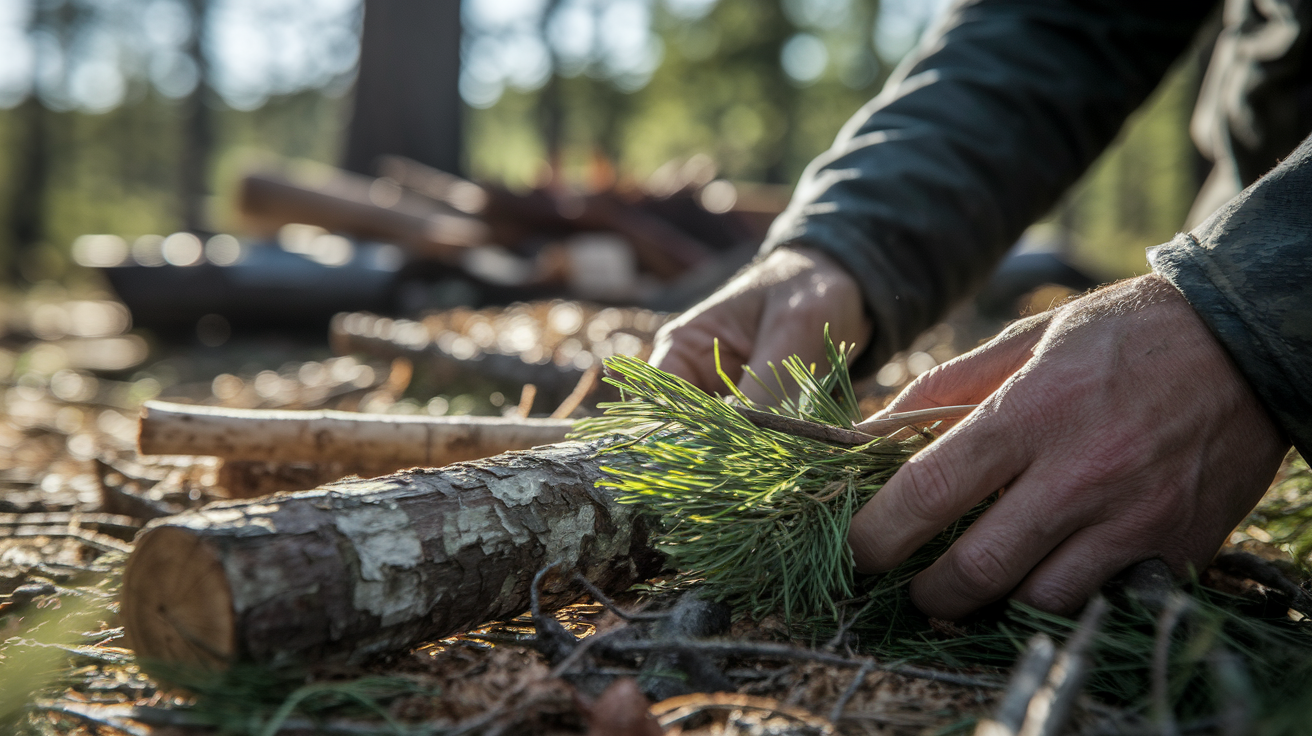
Your first 10 minutes decide if you’ll survive the night or end up as dinner. The game dumps you in with zero tools, no tutorial, nothing. And your hunger and thirst meters? Already ticking down. Bigger predators can smell you, and the clock’s running.
Water first. Always. Pull up your map (TAB) and scan for blue lines or water bodies within 200 to 300 meters. Rivers and ponds work fine, but don’t stand there guzzling like you’re at a spa. Predators camp shorelines looking for exactly that. Find your water, crouch (C key), and move along tree lines or terrain dips. Running across open ground is basically asking to die.
Food depends what you are. Herbivores need bushes or low plants, usually near water. Carnivores have to hunt AI creatures or scavenge corpses. Hold Q to highlight dead things and follow the glow. If you spot a fresh kill, eat fast and get out. The original hunter probably isn’t far. Your first hideout should be elevated ground, thick brush, or some crack in the terrain that breaks line of sight. Ridgelines make you visible from below, so skip those.
Six things to do immediately:
- Check your meters the second you spawn and note how fast they’re draining
- Find the closest water on your map and plan a route using cover
- Drink to about 80 percent, then crouch and move 30 to 50 meters from the water
- Scout for food in a 100 meter circle. Bushes for herbivores, carcasses or small prey for carnivores
- Eat till you hit 70 percent, then retreat to dense cover or higher ground
- Find a spot with two escape routes and sit still for 3 to 5 minutes to watch how predators move
Campaign Progression and Character Development

The Isle starts you as a juvenile. You’ll spend 45 to 90 minutes growing through juvenile, adolescent, sub-adult, and adult stages by eating, drinking, and staying active. But growth isn’t automatic. Get hurt or mess up your diet and you’ll collect debuffs that slow everything down. Herbivores like Pachycephalosaurus grow faster because plants are predictable. Carnivores take longer since hunting carries more risk and prey gets scarce on official servers.
Each stage unlocks abilities and boosts your damage, stamina, and carry weight. Juveniles are weak and slow but harder to spot, so stealth is all you’ve got. Sub-adults gain enough speed to outrun mid-tier threats. Adults unlock combat moves like charging or pouncing. Your growth stage also affects base building. Juveniles can’t haul materials efficiently, so most people wait till sub-adult or adult around the 6 to 12 hour mark before building anything serious.
Survival milestones are your checkpoints. Reach sub-adult without dying and you’ve figured out food and water. Survive to adult and hold territory for 24 hours? You’re ready to build a real base and coordinate with others.
Resource Gathering Essentials
Gathering in The Isle is manual, slow, and you need to stay alert the whole time. There’s no crafting menu or inventory grid like other games. You carry what you can and stash it near your base site. Most materials come from trees, rocks, bushes, or carcasses. You interact, grab what you can, and make trips. A solo player gathering wood pulls in 50 to 150 units per hour depending on tools and terrain. Stone and fiber run closer to 20 to 60 and 30 to 80 units per hour.
You’ll get faster with practice and better route planning. Find renewable clusters within 100 to 200 meters of your base site and map backup zones in case predators force you to move. Always gather during daylight. Night visibility is terrible even with settings maxed, and nocturnal predators see you better. If you’re grouped up, assign someone to gather full time and give them stamina mutations to maximize trips.
Stockpile before you build. You’ll need:
- Wood: 300 to 500 units for basic structures, walls, crafting stations
- Stone: 100 to 200 units for foundations and defensive barriers
- Fiber: 100 to 150 units for bindings, roofing, storage
- Food reserves: 200 to 300 units (dried or preserved) to keep you fed during construction
- Water storage: 100 to 150 units in containers or close to a renewable source
Renewable resources respawn on server timers, usually every 10 to 30 minutes for plants and 60 to 120 minutes for high-value nodes. Nonrenewable resources like certain large carcasses require long trips to distant biomes and carry serious travel risk.
Choosing an Optimal Base Location

Where you build matters more than what you build. A bad site means constant relocation, wasted resources on failed defenses, and ambushes during construction. The right site balances water and food access, natural defensive terrain, and staying hidden from predator routes. Most successful bases occupy transitional zones where two biomes meet. You get resource variety without sitting in the middle of apex hunting grounds.
Water proximity isn’t optional. Your base should sit 50 to 150 meters from a river, pond, or lake to cut down exposure during water runs. Don’t build right on shorelines though. They’re predator highways. Pick elevated ground or tuck behind rock formations that force attackers into predictable angles. Elevation gives you early warning and better sightlines, but don’t climb so high that gathering takes 10 minute round trips.
Visibility cuts both ways. You want to see threats coming, but you don’t want to be seen from across the map. Dense forest clearings hide you but limit sightlines. Clifftops give visibility but turn your base into a landmark for every player on the server. The sweet spot is mid-elevation with one open sightline toward likely threats and natural cover on the other sides.
| Location Factor | Importance |
|---|---|
| Water proximity (50 to 150 m) | Critical. Daily survival depends on safe water access |
| Elevation and sightlines | High. Early predator detection saves lives and resources |
| Distance from apex routes (200+ m) | High. Cuts raid frequency and surprise attacks |
| Resource density (wood, stone, food) | Medium. Impacts build speed and long term sustainability |
| Concealment from distant sightlines | Medium. Deters opportunistic raiders and reduces PvP risk |
Base-Building Mechanics and Construction Steps
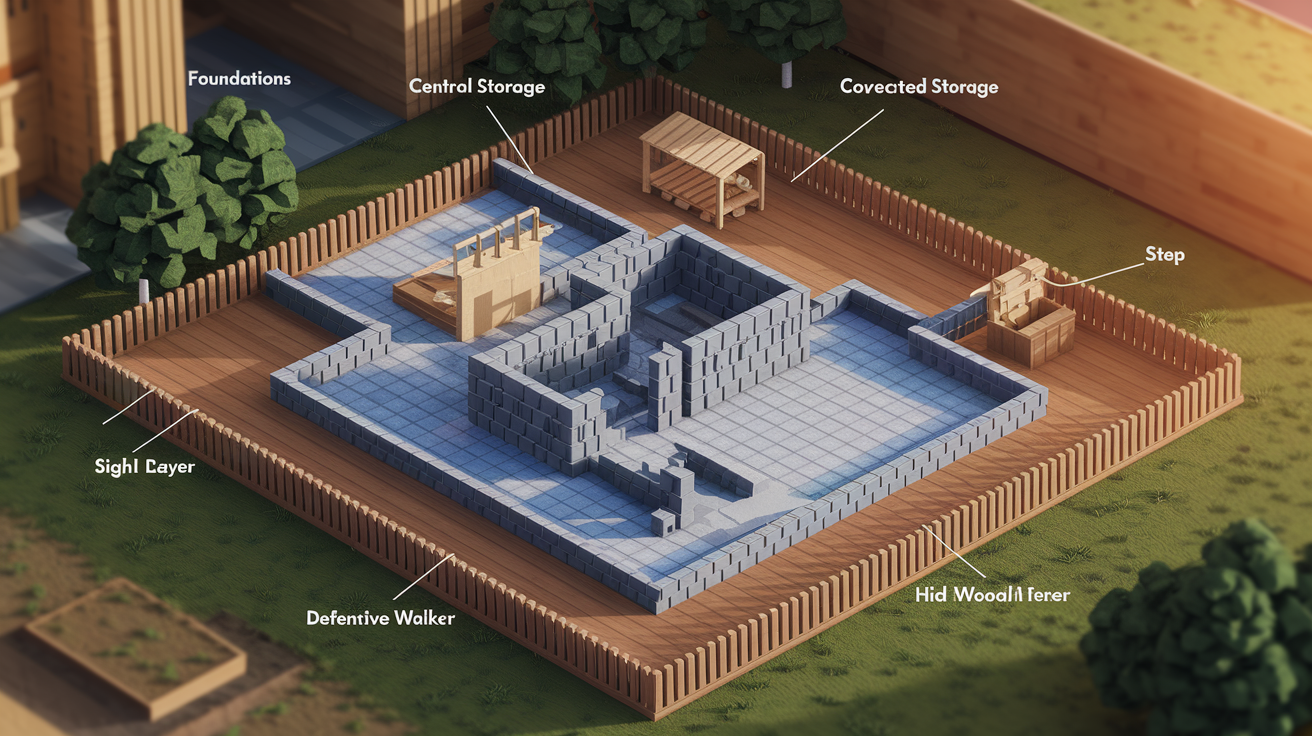
Base construction is modular and tier based. You start with basic wooden structures that provide minimal protection and upgrade incrementally to stone reinforced and metal fortified tiers as you gather more. Each structure needs a foundation, wall segments, a roof, and connectors to link multiple buildings. Placement rules are strict. Foundations must sit on level ground, walls snap to foundations at fixed intervals, and roofs need full perimeter wall support or they collapse.
Durability ties to material tier. Wooden structures have low hit points and decay over 48 to 72 hours without maintenance. Stone and metal structures can take multiple raids and last weeks with periodic repair. Build incrementally. Construct one defensible core building (storage plus crafting station) before expanding. Overbuilding early spreads your resources thin and leaves everything vulnerable. Expect to spend 250 to 400 wood and 40 to 80 stone on your first livable compound. That should include one storage unit, one sleeping shelter, and one crafting area within a 15 by 15 meter footprint.
Seven steps to build and upgrade:
- Clear and level a 20 by 20 meter zone, remove debris and mark corners with temporary resource piles
- Place your central storage foundation first. This anchors your compound and protects high value materials during construction
- Snap four wall segments to the foundation, leave one open for a doorway, then add a roof to complete the storage structure
- Build your crafting station 3 to 5 meters from storage using the same foundation, wall, roof sequence. Connect the two buildings with a covered walkway if you’ve got resources
- Add a sleeping shelter within 10 meters of storage to provide a fallback respawn point and reduce exposure during nighttime raids
- Install your first defensive layer. Wooden spike barriers or low walls in a 25 to 30 meter perimeter around your core buildings
- Upgrade one section to stone every 12 to 24 hours as materials allow, prioritizing storage walls and main entry chokepoints first
Defensive Strategies and Threat Management

Defense is about layers, sightlines, and reaction time. A single wall base is a lunchbox. You need two perimeters. An outer detection layer that slows attackers and gives you warning, and an inner hardened core that can take sustained assault while you organize a counterattack or escape. AI predators follow scent and movement cues and attack predictably. Human controlled threats scout your defenses, test weak points, and coordinate group rushes.
Patrol the outer perimeter every 30 to 60 minutes during active sessions. Assign one pack member to perimeter duty if you’re grouped, or schedule solo patrol windows between resource runs. Walk the full perimeter, check trap integrity, scan for fresh tracks or carcasses within 100 meters. Both signal recent predator activity. Install at least two watchtowers at opposite corners of your compound, positioned to cover overlapping 60 meter sightlines. Watchtowers work as sniper positions and alarm posts, and their elevation makes it harder for ground attackers to disable them quickly.
Structural reinforcements win long raids. Upgrade your inner walls to stone or metal before expanding your compound’s footprint. Install chokepoint gates that force attackers into narrow kill zones. Place spike traps and pressure triggered alarms 10 to 15 meters outside your main walls, spaced every 8 to 10 meters to prevent gap jumping. During an active attack, retreat to your inner core and use ranged abilities or pack coordination to drive attackers into your trap fields. If you’re outnumbered or facing an apex predator, prioritize escape over defense. Every permanent base should have two concealed exit routes that lead to heavy cover or water.
Long-Term Survival Tactics and Optimization

Long term survival shifts from reactive scrambling to calculated risk management. By the 72 hour mark, you’ve either established a defensible base with renewable food and water systems, or you’re stuck in a cycle of resource scarcity and constant relocation. Optimization starts with resource efficiency. Track your daily consumption rates for food, water, and crafting materials, then set minimum reserve thresholds that trigger resupply missions before you hit critical shortages. A solo player should maintain rolling reserves of 300 to 400 food units and 150 to 200 water units. Group bases need 1,000 plus food units and 400 plus water units to weather multi-day raids or server events.
Territory management is about control, not size. Claiming a 500 meter radius around your base sounds strong until you realize you can’t patrol or defend it. Control a compact 100 to 150 meter core zone with clear sightlines and fallback routes instead. Establish secondary resource caches at hidden locations 300 to 500 meters away. If your main base gets raided or overrun, you can relocate to a cache site within 20 minutes instead of starting from zero. Mark cache locations on your map using coordinate capture (TAB plus left click), then paste coordinates into an external map tool for cross session reference.
Four advanced tactics that extend survival duration and reduce catastrophic losses:
- Rotate gathering zones every 48 hours to avoid predictable movement patterns that rival players and persistent predators exploit
- Build decoy structures 200 to 300 meters from your real base to draw raids and waste attacker resources on empty targets
- Schedule high risk activities like long distance resource runs or pack hunts during low population server windows, typically early morning hours in your server’s primary timezone
- Stockpile emergency kits at three external locations, each containing 50 food units, 30 water units, basic crafting materials, and a backup map with alternate base coordinates
Final Words
Secure water, scout food, and pick a quick safe spot, which keeps you alive and sets up the rest.
Push through campaign milestones to grow, gather key materials, and choose a base with water, elevation, and nearby resources.
Build smart: place foundations, upgrade structures, reinforce defenses, and run simple patrols. The guide covered survival starts, campaign progression, resource gathering, base-building steps, defenses, and long-term tactics.
Use this the isle game survival campaign and base-building walkthrough as a quick reference. Start small, iterate fast, and enjoy the climb.
FAQ
Q: What is the most overpowered Dino in The Isle?
The most overpowered Dino in The Isle is often considered the Giganotosaurus, thanks to its very high health and damage that let it dominate fights, though balance updates can change the meta.
Q: What happens when you reach 100% growth in The Isle?
Reaching 100% growth in The Isle means your dinosaur is fully mature, gaining max size, peak stats and adult abilities, which unlock stronger roles, breeding options, and new interactions.
Q: What does Q do in The Isle?
The Q key in The Isle typically triggers your dinosaur’s primary vocal or special action, such as a call, threat display, or species-specific ability used for signaling, attacking, or grouping.
Q: How to progress in The Isle?
To progress in The Isle, feed and survive to gain experience, hit growth milestones, learn abilities, secure resources and territory, and advance into higher growth stages for better skills and options.
