

Think the Astro Bot platinum is a nightmare?
It isn’t, it’s actually one of the friendliest platinums you can earn.
This guide gives a complete roadmap for every trophy, all collectibles, and every so-called missable, with a clear three-phase plan and a realistic time estimate of about 15 hours.
There are zero missable or glitched trophies, and the game shows exact counters so you always know what to replay.
Follow these steps and you’ll collect 300 bots, 120 puzzle pieces, 10 Lost Galaxies, and beat the Great Master Challenge without guesswork.
Complete Roadmap for the Astro Bot Platinum Trophy
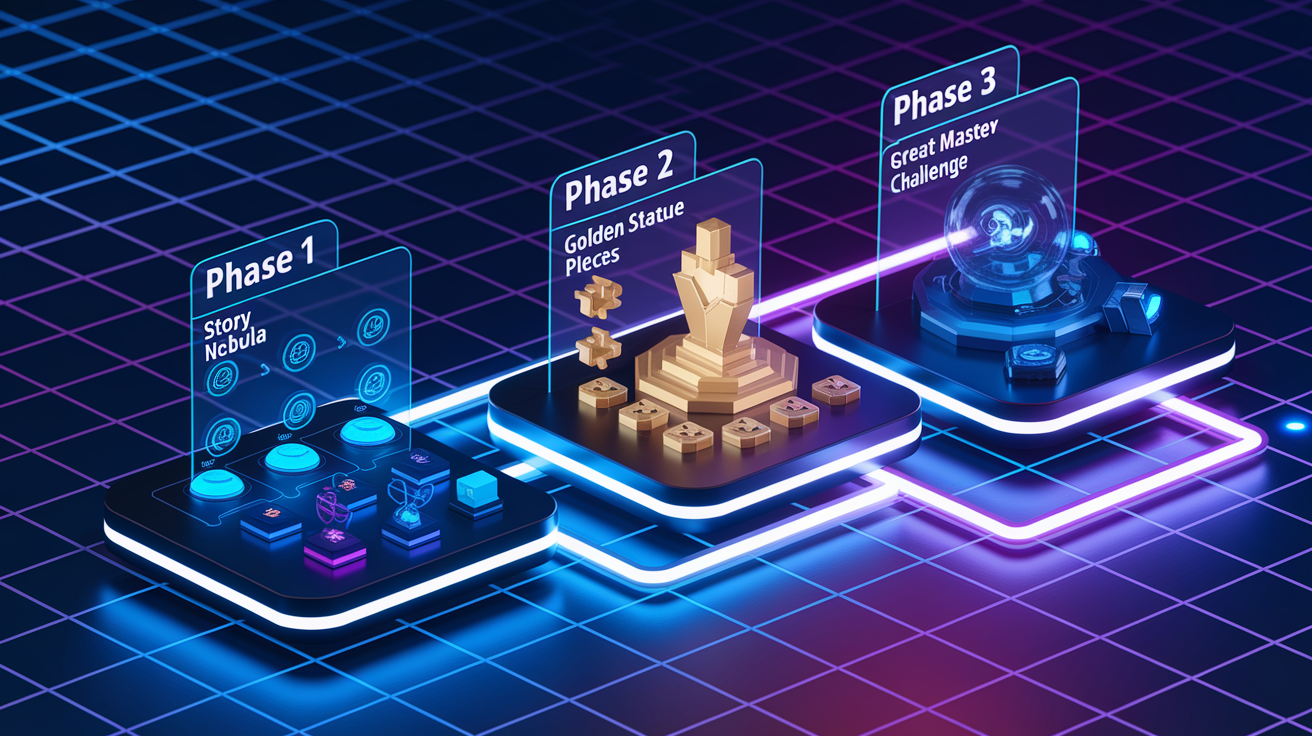
The Astro Bot Platinum sits at a 3 out of 10 difficulty and you’re looking at roughly 15 hours to wrap it up. Zero missable trophies. Zero glitched trophies. All 44 trophies are fair game. You can revisit every collectible after you finish the story, and the game shows you exactly what you’ve missed and where to find it.
The platinum breaks into three clean phases. First, play through the whole story and sweep up every collectible in one go: 300 Bots, 120 Puzzle Pieces, 10 Lost Galaxies, and something like 15,000 coins. Second, unlock the Golden Statue by collecting all Puzzle Pieces, then knock out the Great Master Challenge for the hardest trophy in the set. Third, head to the Crash Site hub and pair specific bots with gatcha items to trigger the last batch of misc trophies.
Replayability’s built in. Every level shows your current counts for Bots and Puzzle Pieces right on the level select screen. You know exactly which stages need a return visit. You can replay any level as many times as you want to farm coins or grab something you walked past. There’s no pressure to nail everything on the first run.
Here’s the condensed three step plan:
- Finish the story while collecting 300 Bots, 120 Puzzle Pieces, 10 Lost Galaxies, and around 15,000 coins for 150 gatcha draws.
- Unlock the Golden Statue with all 120 Puzzle Pieces, then finish the Great Master Challenge to earn The Golden Bot trophy.
- Perform hub area interactions in the Crash Site using specific bot and gatcha combinations to wrap up the remaining misc trophies.
Astro Bot Trophy List Breakdown for Platinum Hunters
Astro Bot splits its 44 trophies into clear buckets: story progression, collectibles, hub interactions, skill challenges, and optional DLC. The main list includes one Platinum trophy called “Astro-nomical!” which pops when you’ve earned all 43 other base game trophies. Story trophies unlock naturally as you finish nebulas and open new Crash Site rooms. Collectible trophies cover Bots, Puzzle Pieces, gatcha prizes, Odin’s Ravens in Bot of War, and Golden Egg Artefacts in Dude Raiding. Hub trophies need specific actions like photographing characters, building bot towers, or triggering unique interactions. Challenge trophies test your platforming and timing on skill focused stages.
Out of 44 trophies, 35 are non secret and 9 are hidden. The hidden trophies tie into exploration, creative actions inside levels, and defeating special enemies. You’ve got stuff like slapping a tree face until it gurgles in Trunk of Funk, dunking a basketball after using the Rocket Dog powerup in Construction Derby, capturing a golden butterfly in Apes on the Loose, and netting two small worms at the same time in Wormy Passage. You’ll naturally discover most hidden trophies by messing with objects and trying out every powerup the game hands you.
Story, collectibles, and skill requirements all feed into each other. You unlock the Safari Park and its camera at 64 Puzzle Pieces, which you need to snap a photo with Nathan Drake and Lara Croft in the Crash Site. You unlock the Gatcha Lab at 16 Puzzle Pieces, and you need 150 gatcha draws to satisfy the coin based trophies. The Great Master Challenge only opens after you’ve placed all 120 Puzzle Pieces and collected all 300 Bots, so progression gates things in a way that keeps every trophy within reach as long as you’re thorough.
| Trophy Name | Category | Requirement | Notes |
|---|---|---|---|
| Astro-nomical! | Platinum | Earn all other trophies | Pops automatically after the last trophy |
| The Golden Bot | Challenge | Complete Great Master Challenge | Hardest trophy, unlocked after 120 Puzzle Pieces + 300 Bots |
| Money Well Spent | Collectible / Coin | Open 150 gatcha prizes | Needs around 15,000 coins |
| Eyes Of The All-Father | Collectible | Destroy all 8 Ravens in Bot of War | Level specific hidden collectibles |
| Thick As Thieves | Hub / Photo | Photo with Drake and Lara in Crash Site | Needs camera from Safari Park (64 Puzzle Pieces) |
| Bot Bot Revolution | Hub | Dance with 100 bots in Crash Site | Summon bots with Triangle, stand in center |
Step-by-Step Astro Bot Platinum Walkthrough Strategy
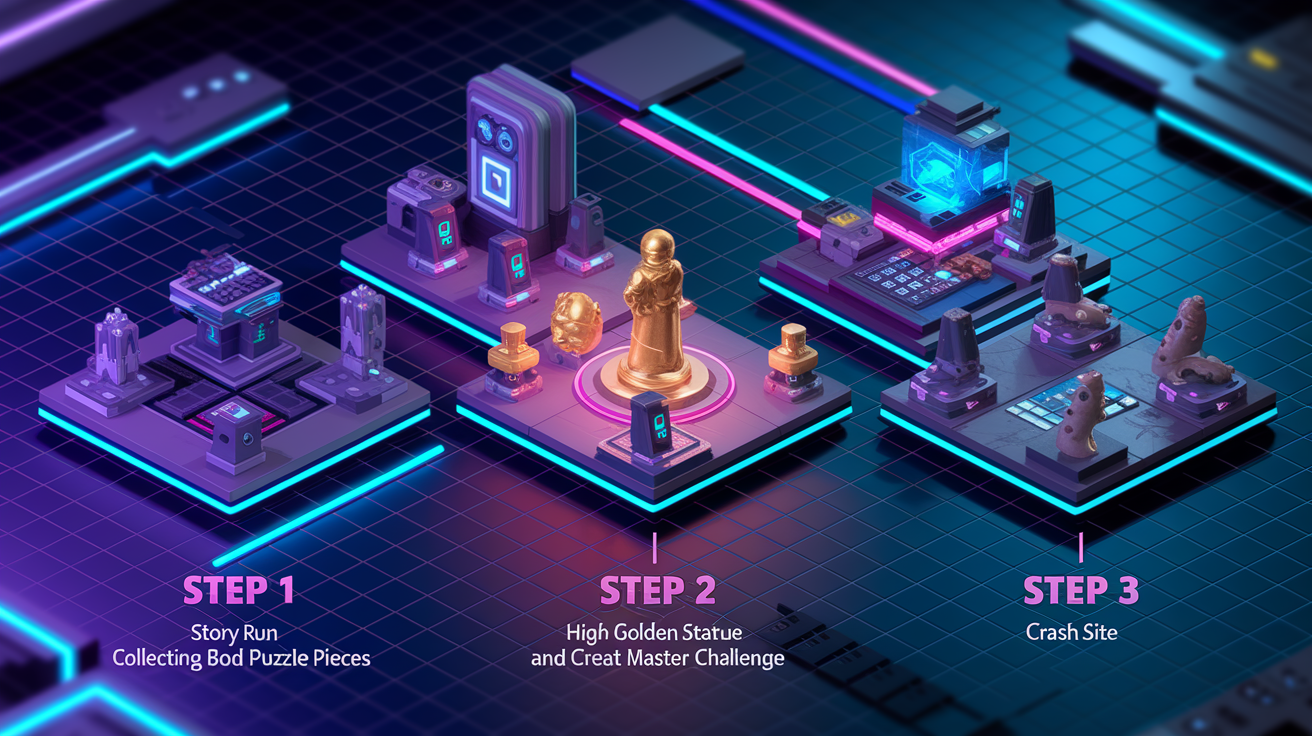
Step 1 is your single 100% completion playthrough. Start from the first nebula and play every level in order. Collect all Bots and Puzzle Pieces you can find, paying attention to the in level counters that tell you if you’ve missed anything. Open every side path, smash every breakable object, and use every powerup at least once to see if it triggers a hidden action. As you go, you’ll unlock new rooms in the Crash Site based on your Puzzle Piece count: the Gatcha Lab at 16, the Dual Speeder Garage at 32, the Changing Room at 48, and the Safari Park at 64. Keep pushing forward until you’ve finished the story and unlocked the final nebula, Lost Galaxy. By the end of this run, you should have close to 300 Bots, 120 Puzzle Pieces, and 10 Lost Galaxies cleared, plus around 15,000 coins from natural exploration and level exit bonus chests.
Step 2 starts after you’ve gathered all 120 Puzzle Pieces. Return to the Crash Site and interact with the Golden Statue, which shows up once you’ve placed every puzzle piece. Make sure you’ve rescued all 300 Bots, then the Great Master Challenge level will unlock. This is the game’s final test, a long platforming gauntlet with checkpoints that need precision timing and route memorization. Finish it to earn The Golden Bot trophy, the single hardest trophy in the set. Along the way, keep farming coins by replaying fast levels like Danger Dojo if you haven’t yet hit 150 gatcha draws. You’ll need 150 gatcha prizes to unlock the Money Well Spent trophy, and since each draw costs 100 coins and the machine occasionally spits out an empty soda can, plan for at least 15,000 coins, possibly more if you’re unlucky.
Step 3 is Crash Site cleanup. Now that you have the camera from the Safari Park, specific Special Bots rescued from late game levels, and enough gatcha items to finish the interaction trophies, start working through the hub requirements. Place Nathan Drake and Lara Croft in the Crash Site, equip the camera, and frame both characters in a single shot to earn Thick As Thieves. For the Kratos and Thor interaction, place Kratos in the hub, slap him, then use the Well Stocked Campfire gatcha item to take cover behind the campfire. Place The Prince bot and use the Rolling Star gatcha, then slap The Prince and watch him roll. Place Crash Bandicoot and the Aku Aku gatcha, then dance with both. Place Kazuma Kiryu and slap him to drop items near the Iconic Gate gatcha. Stand between Ryu and Ken and let them hit you for another trophy. Build a 90 bot tower to the left of the spawn point, summon over 100 bots and dance with them, and lift 10 stones using bot helpers.
Some efficiency tips: always check level counters before you leave a stage so you don’t have to guess which levels need replays. Replay different levels for coin farming to keep the gameplay fresh, but if you want raw speed, stick to Danger Dojo and grab the +100 bonus chest at the exit every time. If you unlock a new Crash Site room early, visit it right away to see which bots and gatcha items you need so you can watch for them in upcoming levels. Use the Safari Park camera as soon as it unlocks to knock out the photo trophy mid run rather than waiting until the end. Always spend time in each level experimenting with powerups, smashing objects, and looking for unusual geometry because many hidden trophies get triggered by curiosity, not by following waypoints.
Here’s an optimized step by step execution order across all phases:
- Play the entire story campaign in order, collecting every Bot and Puzzle Piece you see and finishing all 10 Lost Galaxies.
- Unlock the Gatcha Lab at 16 Puzzle Pieces and start spending coins right away so you can earn First Prize and begin working toward 150 total draws.
- Unlock the Safari Park at 64 Puzzle Pieces and grab the camera, then rescue Nathan Drake from Nebula #3 and Lara Croft from Nebula #4.
- Finish the story, then replay any levels with missing collectibles using the level select counters as your guide.
- Farm coins on Danger Dojo or other fast levels until you’ve opened 150 gatcha prizes, accounting for occasional empty cans.
- Collect all 120 Puzzle Pieces to unlock the Golden Statue, then make sure you have all 300 Bots to open the Great Master Challenge.
- Complete the Great Master Challenge to earn The Golden Bot trophy, using checkpoints and practicing difficult sections in isolation.
- Return to the Crash Site and perform all hub based bot and gatcha interactions to finish the remaining misc trophies.
Collectibles Locations Guide for All Astro Bot Trophies

Every level in Astro Bot displays a counter showing how many Bots and Puzzle Pieces you’ve collected versus the total available. When you pause or view the level select menu, you can see exactly which stages are missing items. This means you can’t permanently lose track of a collectible. You’ll always know where to go back. After finishing the story, the game opens up full free roam and level select, so you can jump into any level at any time to grab what you missed. No time pressure and no penalty for replaying stages.
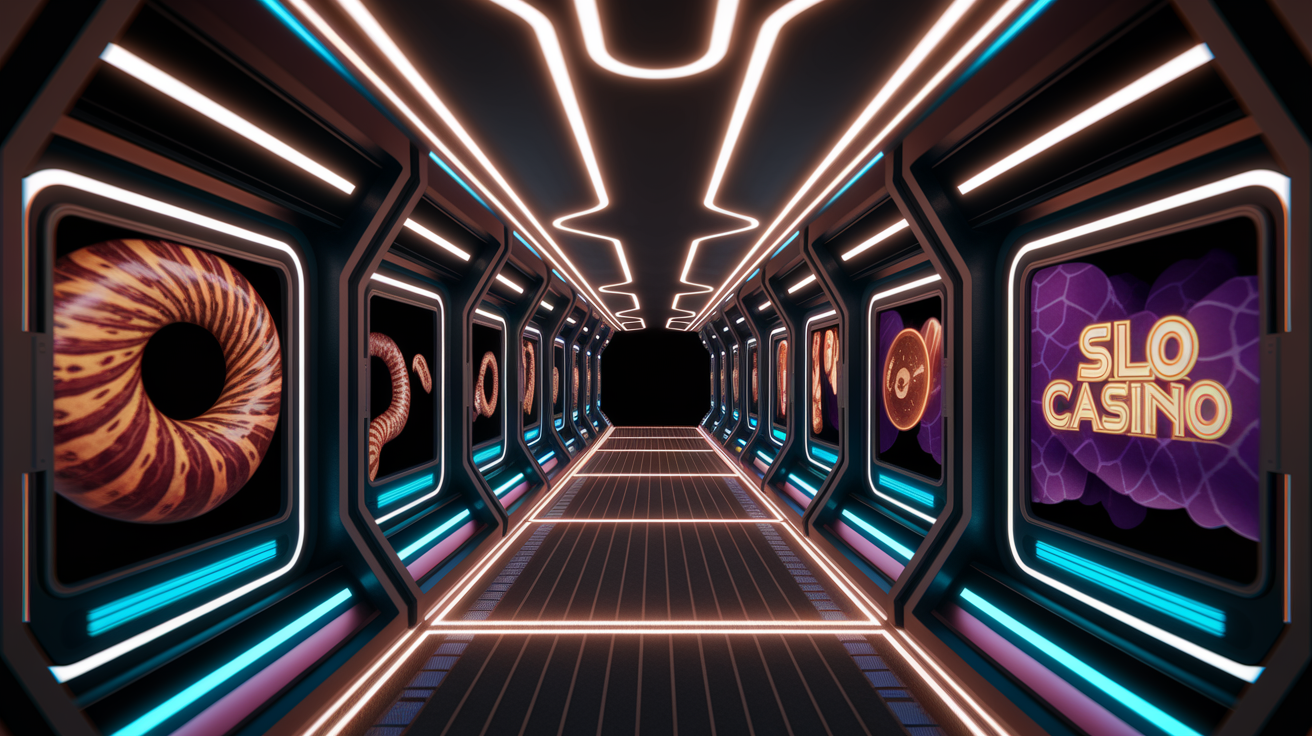
Some chapters hide collectibles behind tricky camera angles or need specific powerups to reach secret areas. Lost Galaxies are secret exits hidden across hub areas that lead to bonus levels, each containing a small set of Bots and Puzzle Pieces. The Serpent Starway sliding area has four stones you need to spin to reveal a double dash icon, which opens a new path. Machine Learning wants you to lure seven enemies into three Tripcaster wires in a single life without using your feet lasers, because electric enemies are immune. Wormy Passage has two small worms you must pull at the same time using the Froggy Gloves, one per glove. Slo Mo Casino asks you to activate Slo Mo and hit jackpots on all four slot machines near the start, watching for three yellow bot icons on each reel. Bubbling Under needs the Penguin powerup, and you must leap a penguin through a dolphin ring after freeing a starfish. Apes on the Loose needs the net to catch an ape, then the net jump technique to capture a golden butterfly hiding in a bush.
Special Bots are regular Bots with recognizable character skins that are needed for certain hub trophies. Nathan Drake is rescued in Nebula #3’s Lady Venomara level. Lara Croft is in Nebula #4’s Hieroglitch Pyramid. Kratos is automatically rescued during Nebula #2’s Wako Tako level, and Thor is found in Bot of War. The Prince from Katamari is in Nebula #2’s Downsize Surprise. Crash Bandicoot is in Nebula #1’s Az Tech Trail. Kazuma Kiryu is rewarded from Nebula #4’s Boing! Bonanza. Ryu is in Nebula #1’s Retro Rampage 1, and Ken is in Nebula #2’s Retro Rampage 2. You need to rescue these specific bots before you can perform the Crash Site interactions that unlock their associated trophies.
Here’s a per collectible type breakdown:
- Bots: always follow Bot shaped icons on the minimap and listen for their distress sounds. Most are visible, but some need powerups or hidden room exploration.
- Puzzle Pieces: often placed on alternate paths or behind breakable walls. Smash everything and check upper platforms.
- Lost Galaxies: scan hub environments for unusual geometry or glowing portals. There are exactly 10 across all hubs.
- Ravens: all 8 are in Bot of War. Look for glowing black birds perched on ledges, towers, and hidden alcoves.
- Egg Artefacts: all 3 are in Dude Raiding’s Serpent Starway final level. Explore every branch and side room.
- Gatcha related finds: prioritize coin collection in every level so you can reach 150 gatcha draws without excessive grinding later.
- Camera dependent collectibles: unlock Safari Park at 64 Puzzle Pieces to access the camera, then revisit any photo based trophies.
Astro Bot Coin Farming, Gatcha, and Economy Optimization

The Gatcha Lab costs 100 coins per draw, and you need to open 150 gatcha prizes to unlock the Money Well Spent trophy. With 169 total prizes in the machine, you’re guaranteed to hit 150 before the machine runs dry, but the machine sometimes gives you an empty soda can instead of a prize, which means you may need slightly more than 15,000 coins to reach 150 actual prizes. Plan for 15,500 to 16,000 coins to be safe. Coins come from collecting floating coins in levels, smashing objects that drop coins, and grabbing the +100 bonus chest that shows up at the end of every level. That bonus chest can be collected on every replay, so you can replay the same level multiple times and still earn the +100 each time.
Typical levels give you around 300 to 400 coins if you rush through without stopping to explore every corner. A rushed playthrough takes about 3 to 4 minutes, which works out to roughly 100 coins per minute. The most efficient farming method is to pick a short level you enjoy, sprint to the exit while grabbing obvious coin clusters, collect the +100 chest, then restart. Danger Dojo, a Lost Galaxy level, is recommended as the single best farm because it’s short, has straightforward geometry, and offers high coin density. If you get bored, rotate between other fast levels like early nebula stages or any level you can finish in under 4 minutes. Variety keeps the grind from feeling repetitive, and the coin per minute rate stays roughly the same.
| Level | Avg. Time | Avg. Coins | Notes |
|---|---|---|---|
| Danger Dojo | 3 minutes | 350 coins | Lost Galaxy level, short, high density, recommended primary farm |
| Sky Garden | 4 minutes | 320 coins | First story level, easy geometry, good for beginners |
| Az-Tech Trail | 3.5 minutes | 340 coins | Early nebula, straightforward path, Crash Bandicoot rescue |
| Retro Rampage 1 | 3 minutes | 300 coins | Fast 2D section, Ryu rescue |
| Construction Derby | 4 minutes | 380 coins | Slightly longer, high coin count from destructible crates |
Hub World Trophy Instructions and Character Interaction Guide
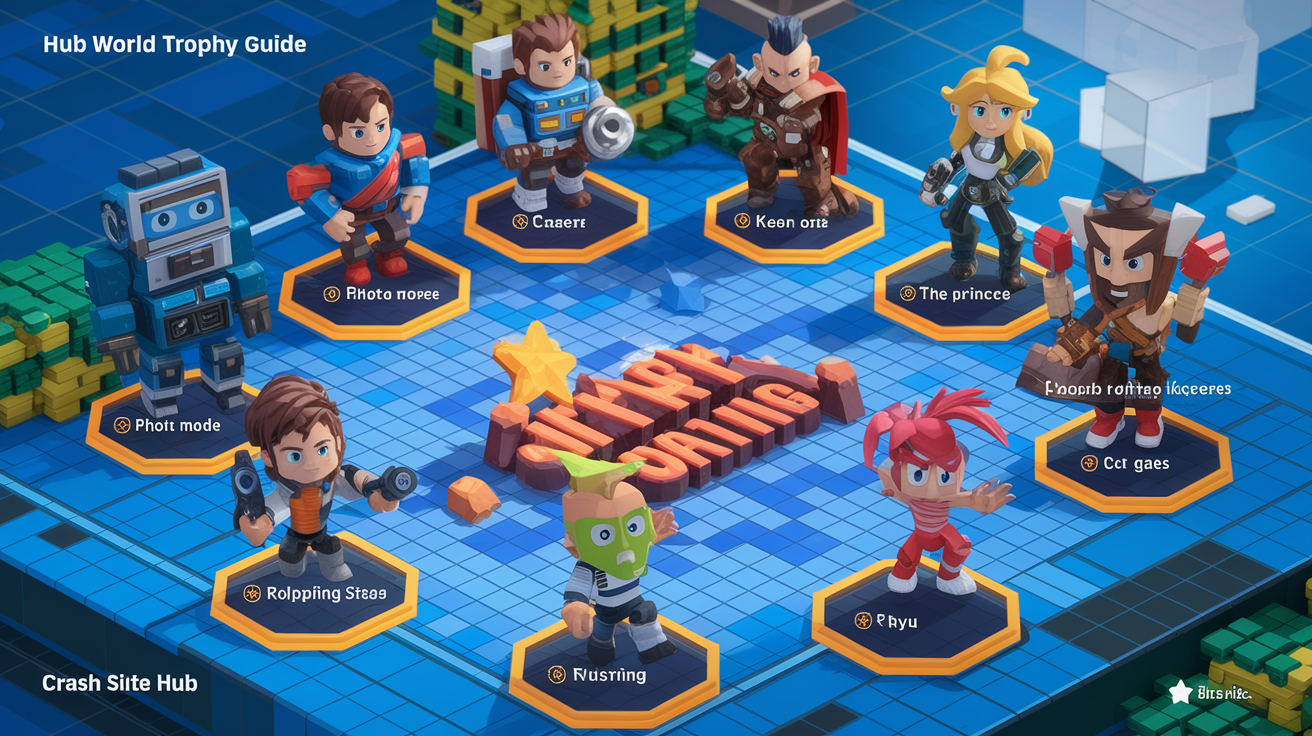
The camera unlocks when you collect 64 Puzzle Pieces and gain access to the Safari Park room in the Crash Site. Once you have the camera, you can activate Photo Mode at any time by pressing the dedicated button. For the Thick As Thieves trophy, you need to rescue Nathan Drake from Nebula #3’s Lady Venomara level and Lara Croft from Nebula #4’s Hieroglitch Pyramid. Place both bots in the Crash Site hub, activate Photo Mode, and frame both characters in a single shot. The trophy pops as soon as you take the picture.
Most hub interaction trophies need specific bot and gatcha item pairings. For Kratos and Thor, place Kratos in the hub, slap him, then use the Well Stocked Campfire gatcha item and take cover behind the campfire to trigger the interaction. For The Prince (Katamari), place The Prince bot and equip the Rolling Star gatcha item, slap The Prince, and watch him roll the star. For Crash Bandicoot and Aku Aku, place Crash in the hub and use the Protective Spirit gatcha item, then dance with both characters. For Kazuma Kiryu, place Kiryu and slap him near the Iconic Gate gatcha to make him drop items. For Ryu and Ken, place both bots in the hub, stand between them, and let them hit you. Each of these interactions is designed to be simple and forgiving. You just need the correct bot and item in the same space, then perform the action.
Building towers, summoning bots, and triggering dances are controlled by the Triangle button. To build a 90 bot tower, summon at least 90 bots and position them to the left of the spawn point, where the game allows vertical stacking. To dance with 100 bots, summon over 100 bots using Triangle, then stand in the center of the group and press the dance button. To lift 10 stones, call bots near the stone tiles and they’ll automatically begin lifting. The game is generous with bot counts, so you don’t need to worry about exact positioning or timing.
For reliable camera work and interaction triggering, adjust your camera sensitivity in the settings if you find it hard to frame characters. Use the right stick to rotate the camera slowly and give yourself a wide field of view. If an interaction isn’t triggering, try repositioning the bots slightly or re equipping the gatcha item. Some interactions need you to be within a specific radius of the bot, so stand close before performing the action.
Here are the most commonly missed hub actions:
- Forgetting to unlock the camera before attempting photo trophies. Make sure you have 64 Puzzle Pieces first.
- Placing bots in the Crash Site but not equipping the correct gatcha item. Always double check the item list.
- Standing too far away when trying to trigger slap or dance interactions. Move closer to the bot.
- Not summoning enough bots for the 100 bot dance trophy. Keep pressing Triangle until the counter shows over 100.
- Skipping the Lost Galaxy levels and missing Special Bots like The Prince or other gatcha related characters.
Astro Bot Challenge-Level and Boss Strategy Guide
The hardest trophies in Astro Bot are tied to skill based stages like Great Master Challenge, Splashing Sprint, and To The Beat. These levels test precision platforming, timing, and pattern recognition. Great Master Challenge is the final test and the single toughest trophy in the game. Splashing Sprint and To The Beat are rhythm and speed challenges that need you to internalize enemy patterns and execute inputs without hesitation. Each of these stages includes checkpoints, so you can retry difficult sections without starting from the beginning.
Machine Learning wants you to lure seven enemies into three Tripcaster wires in a single life. The trick is to avoid using your feet lasers, which kill enemies instantly, and to ignore electric enemies entirely because they’re immune to the wires. Bait ground enemies into the wire zones one at a time, wait for them to walk into the wire, then move to the next group. Wormy Passage asks you to pull two small Wormys at once using the Froggy Gloves, one glove per worm. Position yourself so both worms are within glove range, then activate both gloves at the same time. Slo Mo Casino needs you to hit jackpots on all four slot machines near the start of the level. Activate Slo Mo, watch the reels carefully, and stop each machine when three yellow bot icons line up. Bubbling Under needs the Penguin powerup, and you must leap a penguin through a dolphin ring after freeing a starfish. The Serpent Starway sliding area has four stones you need to spin to reveal a double dash icon, which opens a hidden path.
Checkpoints are generous in most levels, so if you die, you’ll respawn close to where you failed. In longer challenge stages, learn where each checkpoint is placed so you can relax slightly after reaching one. The Great Master Challenge has multiple checkpoints spread across its length, so treat it as a series of short challenges rather than one continuous gauntlet. If you’re stuck on a specific section, replay it until you can clear it three times in a row before moving forward. That level of consistency will carry you through the final run.
Here are six general high difficulty strategies:
- Study enemy and obstacle patterns by watching one full cycle without moving, then execute your route on the second cycle.
- Match your input rhythm to the music or visual cues. Many challenges are designed with audio visual sync in mind.
- Use safe zones, areas where enemies can’t reach you, to catch your breath and plan your next move.
- Practice sections in isolation by dying on purpose after clearing a checkpoint, so you can repeat difficult segments without replaying the entire level.
- Avoid spamming inputs. Deliberate, timed button presses are more reliable than mashing.
- If a section feels impossible, step away for ten minutes and return with fresh focus. Fatigue causes more failures than lack of skill.
Advanced Strategies for Great Master Challenge
Great Master Challenge is the longest and most demanding platforming stage in the game. It combines every mechanic you’ve learned across the campaign into a single gauntlet with tight jumps, moving platforms, enemy waves, and environmental hazards. The level is divided into multiple checkpoint sections, so you never lose more than a minute or two of progress when you die. The key is to treat each checkpoint segment as its own mini challenge and master it before moving forward.
Timing is everything. Many jumps need you to wait for a platform to reach a specific position before leaping. Watch the platform cycle once, count the rhythm in your head, then execute the jump on the second cycle. Don’t rush. The level doesn’t have a timer. Route memorization is critical for the final third of the stage, where multiple hazards overlap. Play the section slowly the first time to map out safe paths, then increase your speed on later attempts. If you’re struggling with a jump, adjust your camera angle to give yourself a better view of the landing zone. A slight camera shift can turn a blind jump into an easy one.
Safe movement means minimizing risk. Don’t try to skip platforms or take shortcuts unless you’ve practiced them multiple times. Stick to the intended path, even if it feels slow, because consistency beats speed in a stage with this many death traps. Respawn expectations are lenient. You’ll restart at the most recent checkpoint, so you can afford to die while learning a section. Use each death as a learning opportunity. Ask yourself what went wrong, was it timing, positioning, or camera angle, then adjust on the next attempt.
The best practice method is segmented repetition. Reach the first checkpoint, then die on purpose and replay that segment five times in a row. Once you can clear it without thinking, move to the next checkpoint and repeat the process. By the time you reach the final stretch, you’ll have muscle memory for every earlier section, and you can focus all your mental energy on the new obstacles. If the final section feels overwhelming, take a break and return later. Fresh eyes and hands will carry you farther than grinding through fatigue.
Stellar Speedway & Winter Wonder DLC Trophy Guide

Stellar Speedway is a free DLC that appears as a yellow galaxy on the main map. It contains five speedrun levels, each with two bots to rescue. The levels are short, time focused challenges that test your ability to move quickly through tight platforming sequences. Each level takes about 6 to 12 minutes to finish on your first attempt, but once you learn the routes, you can finish them in under 5 minutes each. The entire DLC takes roughly 30 to 60 minutes to complete, depending on how quickly you adapt to the speed focused design. The trophies in Stellar Speedway are optional for the Platinum, so you can skip this content entirely if you only care about the main trophy list.
Winter Wonder is another free DLC that appears when a meteor with a red Santa hat lands on the map. It’s a single open level with 15 golden presents scattered across a winter themed environment and seven bots to rescue. The level is non linear, so you can explore in any order. Collecting your first present unlocks the Festive Fellow outfit and awards the Astro ho ho! trophy. Opening all 15 presents earns the Unwrapped! trophy. Climbing to the top of the festive tree, which needs the balloon powerup found elsewhere in the level, unlocks the You’re a star! trophy. Winter Wonder takes about 10 to 20 minutes to finish in full, making it the shortest DLC content in the game.
Both DLCs fit neatly into the platinum process as optional post game content. If you’re going for 100% completion across all trophies, including DLC, tackle Stellar Speedway first because the speedrun practice will sharpen your platforming skills for the main game’s challenge stages. Winter Wonder is best saved for last because it’s relaxing and low pressure, a nice reward after finishing the demanding Great Master Challenge. If you only want the Platinum trophy and don’t care about DLC trophies, you can ignore both entirely and still earn Astro nomical! without any issues.
Final Words
Jump in: Astro Bot’s platinum sits at a relaxed 3/10 difficulty, about 15 hours, with 44 trophies and zero missable or glitched ones, so you can focus on playing, not panicking.
Tackle it in three clear phases — an initial full run, statue and challenge unlocks, then a final cleanup pass — and you’ll avoid tough backtracking.
All levels track collectibles and replay freely, which keeps things simple. Use this astro bot game platinum trophy guide as your map, enjoy the journey, and you’ll get that platinum.
FAQ
Q: How long does it take to get the Astro Bot platinum and how hard is it?
A: The Astro Bot platinum typically takes about 15 hours and has a listed difficulty of 3/10, making it approachable for most players who follow a clear collection and challenge route.
Q: Are any trophies missable or glitched in Astro Bot?
A: The Astro Bot trophy set has 44 trophies with zero missable and zero glitched trophies, so you can collect everything without permanently locking yourself out.
Q: What main collectibles and economy goals are required for platinum?
A: The platinum requires rescuing 300 Bots, finding 120 Puzzle Pieces, unlocking 10 Lost Galaxies, earning roughly 15,000 coins, and obtaining 150 gatcha prizes across playthroughs and replays.
Q: What is the recommended three‑phase strategy to earn the platinum?
A: The three‑phase strategy is: complete a 100% main-game run, unlock the golden statue and finish the Great Master Challenge, then clean up hub trophies, coins, and gatcha prizes.
Q: Which levels are best for coin farming and how fast is farming?
A: The Danger Dojo is the best coin farm, yielding about 300–400 coins per 3–4 minute run, roughly 100 coins per minute, making repeated runs efficient for gatcha needs.
Q: Do levels allow replay and how does collectible tracking work?
A: All levels allow replay and show collectible counters, so you can revisit any missed Bots, Puzzle Pieces, or Lost Galaxies and track progress without guesswork.
Q: How much skill is needed for the hardest trophies and which ones are toughest?
A: The hardest trophies need moderate skill: Great Master Challenge, Splashing Sprint, and rhythm or precision stages demand practice, pattern memorization, and tight input timing.
Q: Is the DLC required for the main platinum and what do DLCs add?
A: The DLC is optional for the main platinum; Stellar Speedway adds speedrun levels (30–60 minutes) and Winter Wonder adds short collectible content (10–20 minutes) and optional trophies.
Q: What’s the optimal trophy pop order to minimize backtracking?
A: The optimal pop order is story and full-collection first, then statue/challenge content unlocked by collections, and finally hub cleanup, coin farming, and remaining gatcha pulls.
Q: How do hidden trophies and special bots work and where are key examples?
A: Hidden trophies unlock naturally through exploration; special Bots appear in specific levels like Nathan Drake in Nebula #3 and Lara Croft in Nebula #4, and Safari Park camera helps reveal secrets.
Q: How many gatcha pulls and coins do I need, and can I pull empties?
A: Gatcha needs 150 prizes; each pull costs 100 coins, so plan for over 15,000 coins. Empty draws are possible, so budget extra farming time for unlucky runs.
Q: Any quick tips for mastering the Great Master Challenge?
A: For the Great Master Challenge, study routes, practice segments, use safe zones, learn checkpoint behavior, and rehearse rhythm inputs—short, focused repeats beat long messy runs.
