

Think spamming the biggest units is the only way to win the TABS campaign?
It usually fails—one catapult stone or a Berserker leap wipes a tight blob.
This guide gives clear, repeatable unit combos and tactical formations that win fast and save budget.
You’ll learn how to space units so splash damage misses, build a front line that soaks hits, and stack ranged fire on high ground.
Follow these simple swaps and placement tricks and most campaign missions fall in minutes.
How to Beat the TABS Campaign: Winning Strategies Fast
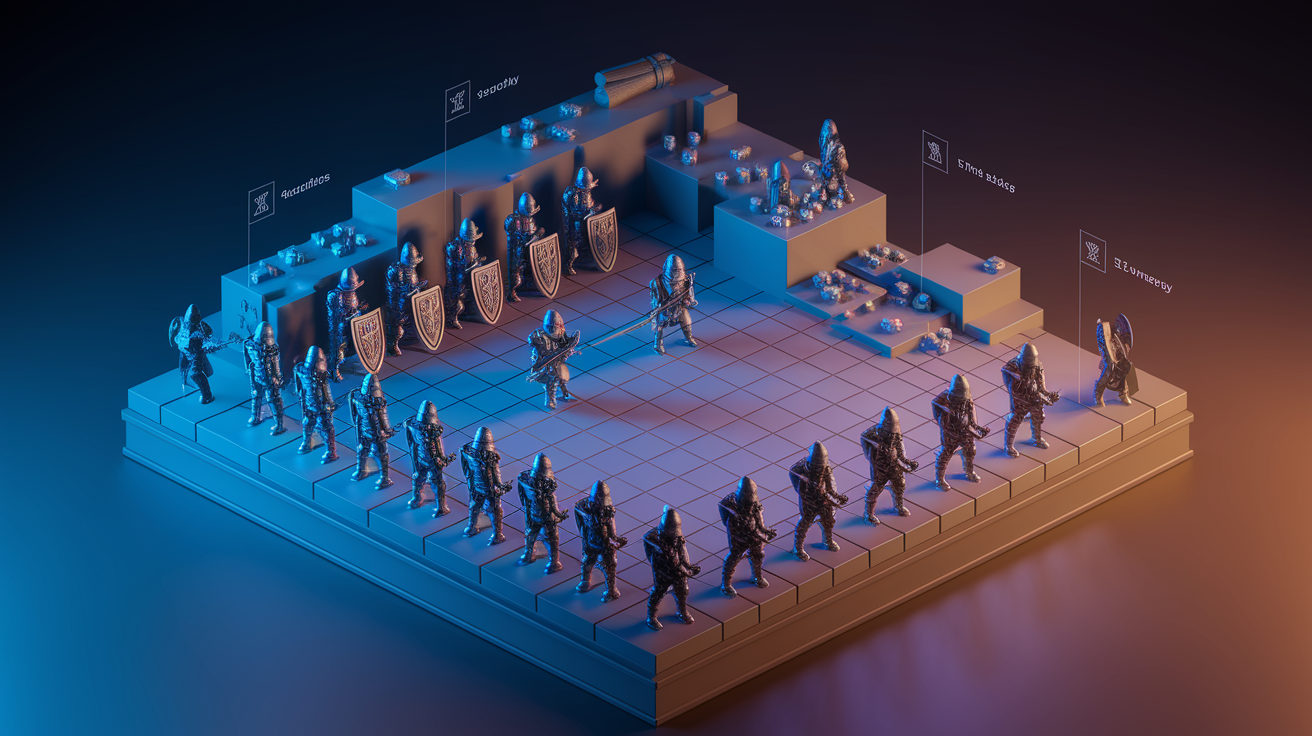
Every TABS campaign level gives you a budget and a small sandbox to solve a placement puzzle. The fastest wins come from understanding three things: spread units so splash damage doesn’t wipe them all at once, build a front line that can take hits, and stack ranged firepower behind it. A tight blob of units dies to one catapult stone. A staggered line survives the first volley and keeps shooting.
Cost-efficient combos win early campaigns and save budget for late-game specialist units. Knights paired with a single Healer can hold a chokepoint while Archers wear down enemies from elevation. Berserkers and ranged units create natural synergy. Berserkers leap into enemy lines, scattering formations so your Archers land free shots on isolated targets. Later missions reward precise counters more than raw numbers, so swap cheap swarms for high-damage specialists like Tree Giants or Reapers when the enemy brings heavy armor.
Most early levels fall to simple placement shortcuts. Put shield units one step forward to absorb projectiles. Drop ranged units on any slope or elevated terrain the map offers. Use one fast unit (Halflings or Squires) to pull aggro and buy your main force three extra seconds. Those seconds matter when your Archers need time to fire two volleys instead of one.
Six fast-win techniques that clear most campaign missions:
- Counter ranged lines by rushing Berserkers or Jousters straight into enemy archers before they finish their first volley.
- Flank heavy units with cheap Clubbers or Halflings from the side while your front line holds center.
- Use one high-health distraction unit like a Mammoth to draw fire while ranged units pick off enemies.
- Place Healers one row behind your front line so they can reach Knights and Shieldbearers without standing in the kill zone.
- Exploit terrain. Drop melee units at the top of slopes so enemies walk uphill into your attacks.
- Test placements in Sandbox first and copy winning formations into the campaign with minor budget adjustments.
Core Faction Strengths and Weaknesses

Each faction brings a playstyle that shapes how you approach different enemy types. Medieval factions lean on Healers to extend Knight durability, turning a short fight into a long grind that favors whoever brought more support. Viking Berserkers leap across the field to break ranged clusters, but they arrive scattered and vulnerable to counterattacks from tight shield walls. Dynasty Monks knock enemies backward with staff strikes, creating space and disrupting charges, though they struggle against ranged volleys that keep them at distance.
Some factions solve mobility problems while others stack ranged density. Pirate Musketeers fire devastating volleys but reload slowly, so pairing them with cheap melee units buys the time they need. Renaissance Arquebusiers excel at focused fire but cost more per unit, meaning you field fewer bodies and risk being overrun by swarms. Wild West factions bring Quick Draw and Gunslingers for precision picks. Spooky factions use Reapers and Necromancers to sustain pressure through resurrections and scythe swings.
Faction attributes and typical counters:
- Medieval – High durability with Healers and Knights. Weak to flanking cavalry and explosive AOE. Counter with Berserkers or Catapults.
- Viking – Aggressive leap units that disrupt formations. Vulnerable when scattered. Counter with shield walls or massed spears.
- Dynasty – Knockback control and martial-arts combos. Struggles against ranged focus fire. Counter with Musketeer lines or elevated Archers.
- Pirate – Devastating musket volleys with slow reloads. Needs a meat shield. Counter by rushing before the second volley.
- Wild West – Precision single-target damage. Low armor, high lethality. Counter with cheap swarms that absorb shots.
- Spooky – Resurrections and scythe sweeps. Relies on Necromancer survival. Counter by sniping the Necromancer first.
- Renaissance – Focused Arquebusier fire and Leonardo’s Tank. Expensive per unit. Counter with flanking Halflings or divers.
Level-by-Level Campaign Walkthrough
Early campaign missions test whether you understand unit spacing and basic counters. The first few battles pit small melee groups against each other. Drop six Clubbers spread across your deployment zone and you’ll win without a plan. By level three or four, enemies add Archers or Spear Throwers, so you need shields up front. A line of three Shieldbearers with four Archers behind them clears the next cluster of missions without adjustments.
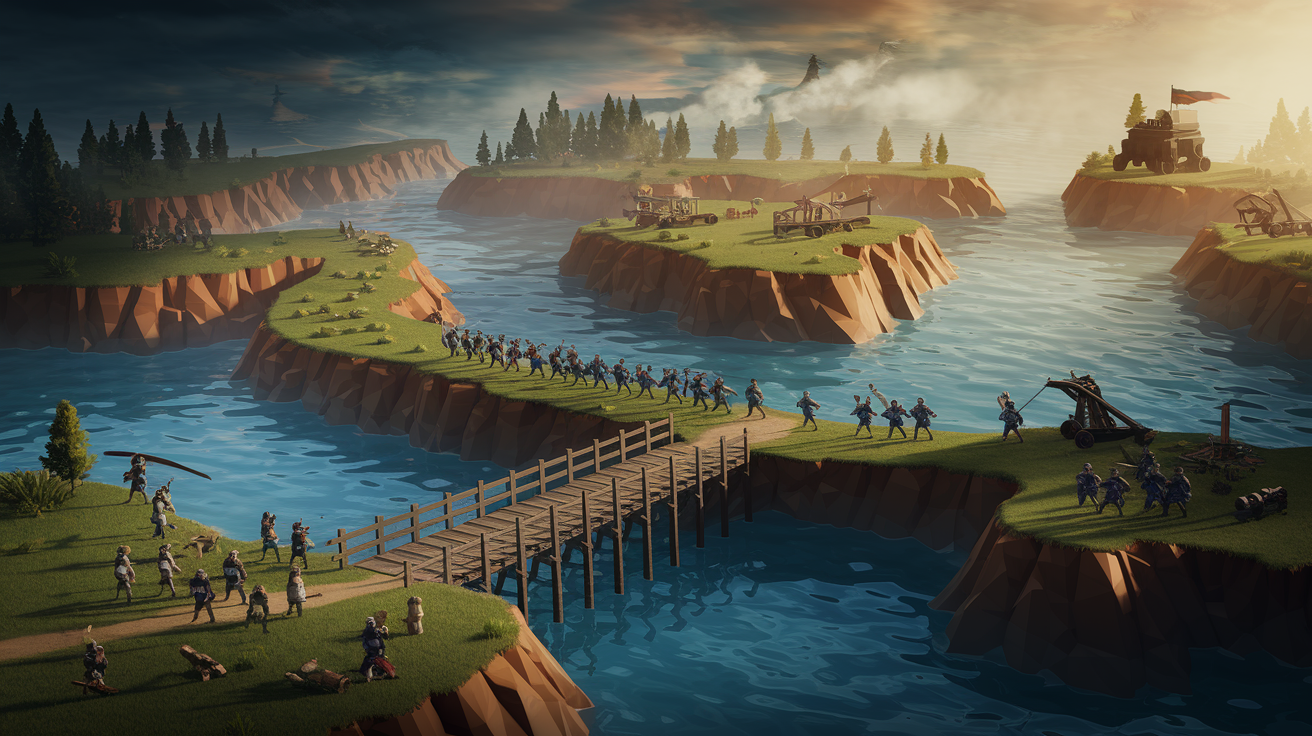
Mid-game maps introduce rivers, cliffs, and narrow bridges that change how units path. Enemies bunch at chokepoints, so one Catapult or Bomb on a Timer can wipe half their army before melee contact. If the map has a hill, put ranged units on top and melee units at the base. Elevation extends range and gives your Archers extra shots. When enemies bring heavy units like Mammoths or King, counter with high-damage divers like Valkyries or use Berserkers to stagger them while ranged units chip health.
Late-game missions stack multiple threats in one army. Shielded front line, ranged backline, a Tank or Reaper in the middle. You need layered answers. Place Knights with a Healer to hold the front, add Snake Archers to bypass shields and hit the backline directly, then drop one Reaper or Tree Giant to trade with their heavy unit. If the enemy brings ten Musketeers, rush them with Halflings before the second volley. If they bring a fortress of Pikemen, use Catapults or ranged units on elevation to wear them down without committing melee.
The final stretch rewards hard counters and creative placements. One mission might throw twenty weak units at you. Bring a single Tank or Mammoth and let them walk into the turret. Another might field three Reapers. Counter with your own Reaper plus ranged support to focus-fire one at a time. Test risky ideas in Sandbox before spending campaign budget, then copy the formation and adjust unit counts to fit the mission’s cost cap.
| Level | Main Threat | Recommended Units | Strategy Summary |
|---|---|---|---|
| Introduction 1 | Six Clubbers | Six Clubbers | Spread units to avoid overlapping hitboxes. Let them brawl. |
| Introduction 3 | Archers and Clubbers | Three Shieldbearers, Four Archers | Shields front, Archers behind. Absorb arrows, return fire. |
| Adventure 2 | Spear Thrower cluster | Two Knights, Six Halflings | Rush with Halflings to scatter them. Knights clean up. |
| Dynasty 4 | Monks with knockback | Musketeers on elevation | Ranged focus fire from high ground. Don’t engage melee. |
| Renaissance 5 | Leonardo’s Tank | Berserkers, one Reaper | Berserkers leap to distract. Reaper duels the Tank. |
| Pirate 6 | Ten Musketeers | Twelve Halflings | Swarm before second volley. Overwhelm with numbers. |
| Spooky 7 | Reapers and Necromancer | Snake Archers, one Reaper | Snipe Necromancer first. Duel Reapers one-on-one. |
| Wild West 8 | Gunslingers on rooftops | Ballooneer, Clubbers | Ballooneer immobilizes snipers. Clubbers rush. |
Budget Optimization and Cost-Efficient Army Building

Every campaign mission caps your spending, so expensive units like Zeus or Thor rarely fit unless the level gives bonus gold. Cheap units that punch above their cost become your core. Clubbers cost almost nothing and win early brawls through sheer numbers. Spear Throwers deliver ranged damage for less than an Archer, and Skeleton Warriors respawn once, giving you two lives for one price. Pairing cheap melee with a single high-impact unit like a Knight or Berserker swings difficult fights without blowing the budget.
The best value comes from units that survive long enough to deal damage twice. A lone Halfling dies in one hit, but five Halflings scatter enemy focus fire and three will reach the backline. One Healer behind a Knight triples that Knight’s effective health, turning a 200-gold unit into a 600-gold threat. Test combinations in Sandbox to find which cheap units synergize. Clubbers plus one Catapult, Skeleton Warriors plus one Healer, or Halflings plus one Tank all outperform their individual costs.
Five cost-efficient combos that consistently win on tight budgets:
- Three Knights, One Healer, Four Archers – Durable front line with sustained ranged pressure. Fits most 800–1,000 gold missions.
- Twelve Clubbers, One Catapult – Swarm distracts while Catapult one-shots clusters. Works against ranged-heavy enemies.
- Six Spear Throwers, Six Halflings – Ranged poke plus melee rush. Halflings absorb damage, spears clean up.
- Two Berserkers, Eight Skeleton Warriors – Berserkers break formation, Skeletons respawn to finish. Great against shield walls.
- One Reaper, Ten Peasants – Peasants tank damage and body-block. Reaper sweeps once enemy clumps.
How to Counter Common Enemy Formations
Shield walls crumble when you attack from the side or behind. Enemies with shields face forward, so dropping Halflings or Squires on the flank forces them to turn and exposes their backs to your main force. Explosive units like Bomb on a Timer or Catapult ignore shields entirely. The splash damage hits everyone in range regardless of block direction. If you can’t flank or explode them, use units that leap or dive over the front line. Berserkers and Valkyries land in the middle of the formation and fight from inside out.
Ranged clusters fall to fast-moving divers or jumpers that close distance before the second volley. Berserkers leap into Archer lines and scatter them. Wheelbarrow Dragons charge straight through. Jousters on horseback trample ranged units before they reload. If you don’t have mobile units, bring your own ranged line and focus-fire their squishiest targets first. Kill half their Archers before they kill half yours, and you win the trade.
Cavalry-style units lose to braced pikes and spear walls because charging into a forest of pointy sticks ends predictably. If the enemy fields Pikemen, avoid melee charges and bring ranged units to whittle them from a distance. Musketeers, Snake Archers, and Catapults all bypass pike formations. If you must commit melee, send one disposable unit first to trigger the bracing animation, then rush with your main force while pikes reset.
Five-step sequence for identifying and breaking formations:
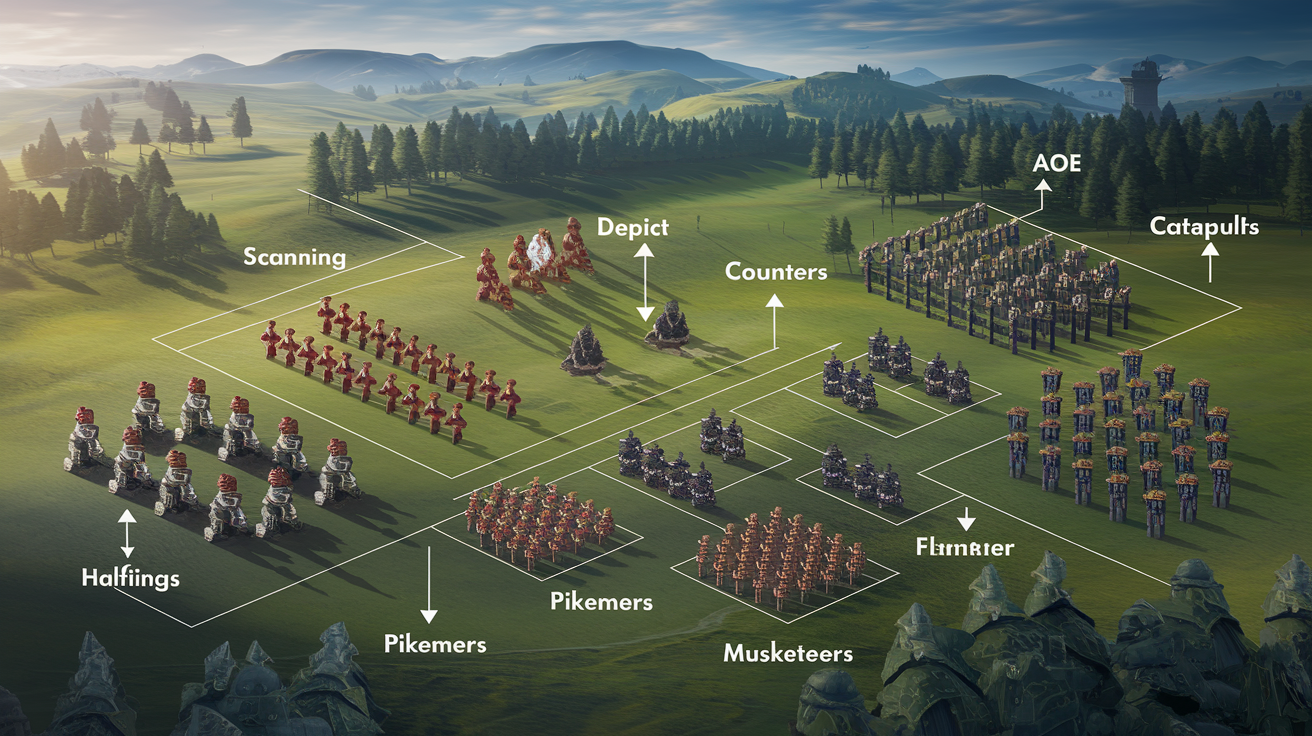
- Scan enemy deployment – Note whether they cluster tight (vulnerable to AOE), spread wide (vulnerable to focus-fire), or stack shields front (vulnerable to flanking).
- Pick the counter type – AOE for clusters, divers for ranged lines, flankers for shield walls, ranged for pikes.
- Set your formation – Spread units to avoid their AOE, place ranged on elevation, position melee to absorb initial contact.
- Commit first wave – Send disposable units or fast units to trigger enemy abilities and pull them forward.
- Follow with main force – Once enemy formation breaks or commits, push your core units into gaps and focus-fire high-value targets.
Secret Units and How They Change Campaign Strategy

Secret units unlock by interacting with props hidden across campaign maps. Clicking a statue might spawn Artemis, shooting a cannon might unlock the Bomb Cannon unit. These units often bend or break standard game rules, giving you tools that trivialize late-game puzzles. Artemis fires homing arrows that never miss, turning ranged battles into executions. Cheerleaders buff nearby units with stat boosts, amplifying your entire formation. The Bomb Cannon launches area-denial explosives that zone enemies into kill corridors.
Locating secrets requires curiosity and willingness to click suspicious objects during placement phase. A golden weapon leaning against a wall might be interactable. A glowing pedestal tucked in a corner might hide a unit. Once unlocked, secret units stay available across all future campaign runs, so finding them early makes the rest of the campaign easier. Some secrets reward specific faction experimentation. Combining certain Legacy units in Sandbox can spawn Tornado, a crowd-control effect that scatters entire armies.
| Unit Name | Location Hint | Strength | Best Used Against |
|---|---|---|---|
| Artemis | Click statue in Fantasy campaign | Homing arrows, never miss | Fast-moving or evasive units |
| Cheerleader | Hidden in Simulation map corner | Buffs nearby unit stats | Boosting Knights or Reapers |
| Bomb Cannon | Interact with loose cannon prop | Area-denial explosives | Clustered melee or shield walls |
| Tornado (combo) | Combine specific Secret faction units | Scatters entire formations | Dense enemy armies |
Final Words
Start by spreading units, using shield units as a front line, and staggering ranged attackers. Cheap swarms work early. Switch to high-damage specialists later.
We covered faction strengths, a level-by-level walkthrough, budget builds, formation counters, and where secret units hide. Each section gives quick, usable choices so you win faster and with fewer retries.
Use this tabs game single-player campaign strategies guide to pick cost-efficient combos, counter enemy formations, and unlock late-game options, then try the tweaks one map at a time. You’ll get better fast.
FAQ
Q: What is the hardest level of campaign in TABS?
A: The hardest level of campaign in TABS is usually the final boss encounter, where mixed elite units, high health, and map hazards demand perfect counters, timing, and optimized formations to win.
Q: What’s the weakest unit in TABS?
A: The weakest unit in TABS is typically the cheapest filler melee (like peasants or clubbers) since they have low health, minimal damage, and no special abilities beyond stalling or distracting enemies.
Q: How do I turn on god mode in TABS?
A: Turning on god mode in TABS requires using Workshop mods or developer/debug builds; the standard retail game has no official god mode toggle. Follow mod installation instructions and back up files first.
Q: What is the best secret character in TABS?
A: The best secret character in TABS is often Artemis for its long-range, high-damage bursts and area pressure, though Bomb Cannon or Cheerleader can outperform it depending on map and enemy setup.
